
Paint your Wagon
-
1960SeriesII
- High range
- Posts: 103
- Joined: Mon Jun 09, 2014 7:09 am
Re: Paint your Wagon
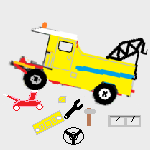
That Australian yellow is my new favourite colour, I've been drooling over photos of that truck ever since I saw it in CLR. It even got me wondering about re-painting my fire truck
-
DasLandRoverMan
- The 1-Ton Welder
- Posts: 1334
- Joined: Sat Oct 20, 2012 9:33 am
- Location: West Lakes
- Contact:
Re: Paint your Wagon
So it looks like it's on fire rather than there to put it out?
-
Wheeledbeast
- In overdrive
- Posts: 1360
- Joined: Mon Apr 15, 2013 1:41 pm
Re: Paint your Wagon
I can only just get round my local hair pin as it isOr extend the back end and add an extra axle?

-
1960SeriesII
- High range
- Posts: 103
- Joined: Mon Jun 09, 2014 7:09 am
Re: Paint your Wagon
It would help to stop it looking like a monster ladybugDasLandRoverMan wrote:So it looks like it's on fire rather than there to put it out?

-
Wheeledbeast
- In overdrive
- Posts: 1360
- Joined: Mon Apr 15, 2013 1:41 pm
Re: Paint your Wagon
something like this 

-
1960SeriesII
- High range
- Posts: 103
- Joined: Mon Jun 09, 2014 7:09 am
Re: Paint your Wagon
Hmmm, PoM material
-
Wheeledbeast
- In overdrive
- Posts: 1360
- Joined: Mon Apr 15, 2013 1:41 pm
Re: Paint your Wagon
A couple of shots of a recent expedition to a local garage  . This place has hardly changed in 30 years to my knowledge, probably longer. The old pump is from the 1920s. The other two are from the 50s and 60s.

I have used the photo editor to sort out the security cameras, and I had to hide a people carrier that was parked next door, but even with my amateur effort the seapia seems to cover it up.

The shame is that the window behind the petrol pumps is backed with old /period garage junk, Michelin men, tins of golden film, Castrol etc, but the window at the front was empty. I guess I just need to learn to use a better and faster photo editor.
.... and again

. This place has hardly changed in 30 years to my knowledge, probably longer. The old pump is from the 1920s. The other two are from the 50s and 60s.I have used the photo editor to sort out the security cameras, and I had to hide a people carrier that was parked next door, but even with my amateur effort the seapia seems to cover it up.
The shame is that the window behind the petrol pumps is backed with old /period garage junk, Michelin men, tins of golden film, Castrol etc, but the window at the front was empty. I guess I just need to learn to use a better and faster photo editor.
.... and again
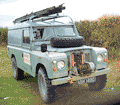
Re: Paint your Wagon
Great work!
http://sebvehicles.blogspot.co.uk/
http://eblrs.org/
1966 IIA Swb 24125067C ex-SEB managers vehicle HMO968D
1969 IIA 1-Ton 22900013A ex-SEB NBK148G
1972 III 1-Ton 26600078A ex-SEB Cherrypicker VJT440L
1973 III 1-Ton 26600082B ex-SEB MRX287L
http://eblrs.org/
1966 IIA Swb 24125067C ex-SEB managers vehicle HMO968D
1969 IIA 1-Ton 22900013A ex-SEB NBK148G
1972 III 1-Ton 26600078A ex-SEB Cherrypicker VJT440L
1973 III 1-Ton 26600082B ex-SEB MRX287L
-
Wheeledbeast
- In overdrive
- Posts: 1360
- Joined: Mon Apr 15, 2013 1:41 pm
Re: Paint your Wagon
A big Job has broken out  can you tell what it is yet.

It certainly gave me a bit of a work out, i have discovered muscles i never new i had .
The timber floor was total scrap, some places where so rotten you could poke your finger through it.

It was also hiding a couple of nasty tin worm infestations
can you tell what it is yet. It certainly gave me a bit of a work out, i have discovered muscles i never new i had
. The timber floor was total scrap, some places where so rotten you could poke your finger through it.
It was also hiding a couple of nasty tin worm infestations
Last edited by Wheeledbeast on Thu Aug 03, 2017 8:55 pm, edited 2 times in total.
-
Wheeledbeast
- In overdrive
- Posts: 1360
- Joined: Mon Apr 15, 2013 1:41 pm
Re: Paint your Wagon
I have made some progress with the rear load bed . I have repaired all four outriggers and the shock absorber mountings. I have salvaged three good wheel arch sections, and replaced the inner wheel arch with some plastic lorry wheel arches that I have found in various laybys.(people who where suspicious about the amount of time I spend in lay bys… well now you know why  ). Unfortunately they are not the same type as each other, but once the floor goes back in I don’t think anyone will notice.
The exhaust was loose, this turned out to be a sheared stud in the manifold . I managed to drill it and replace it with the manifold in situ, but not a job I was planning to do . The old exhaust exited under the vehicle and was sooting up the rear axle. So I have extended it and moved the exit to the back. ( I have lost a little ground clearance, and it’s not ideal if you are using the recovery jib, but I hope it will make the cab a slightly quieter place
  ).
).

I have installed a new aluminium cross member between the chassis rails this will support the join in the floor sections, it is just to stop the timber getting damp and sagging, so should not need to take much weight. Finally everything has had a coat of paint.

Next job is to break out the third form carpentry skills and see about cutting some timber for the floor .
. I have repaired all four outriggers and the shock absorber mountings. I have salvaged three good wheel arch sections, and replaced the inner wheel arch with some plastic lorry wheel arches that I have found in various laybys.(people who where suspicious about the amount of time I spend in lay bys… well now you know why ). Unfortunately they are not the same type as each other, but once the floor goes back in I don’t think anyone will notice.The exhaust was loose, this turned out to be a sheared stud in the manifold
. I managed to drill it and replace it with the manifold in situ, but not a job I was planning to do . The old exhaust exited under the vehicle and was sooting up the rear axle. So I have extended it and moved the exit to the back. ( I have lost a little ground clearance, and it’s not ideal if you are using the recovery jib, but I hope it will make the cab a slightly quieter place ).I have installed a new aluminium cross member between the chassis rails this will support the join in the floor sections, it is just to stop the timber getting damp and sagging, so should not need to take much weight. Finally everything has had a coat of paint.
Next job is to break out the third form carpentry skills and see about cutting some timber for the floor
.
Last edited by Wheeledbeast on Thu Aug 03, 2017 7:57 pm, edited 1 time in total.
Who is online
Users browsing this forum: No registered users and 11 guests